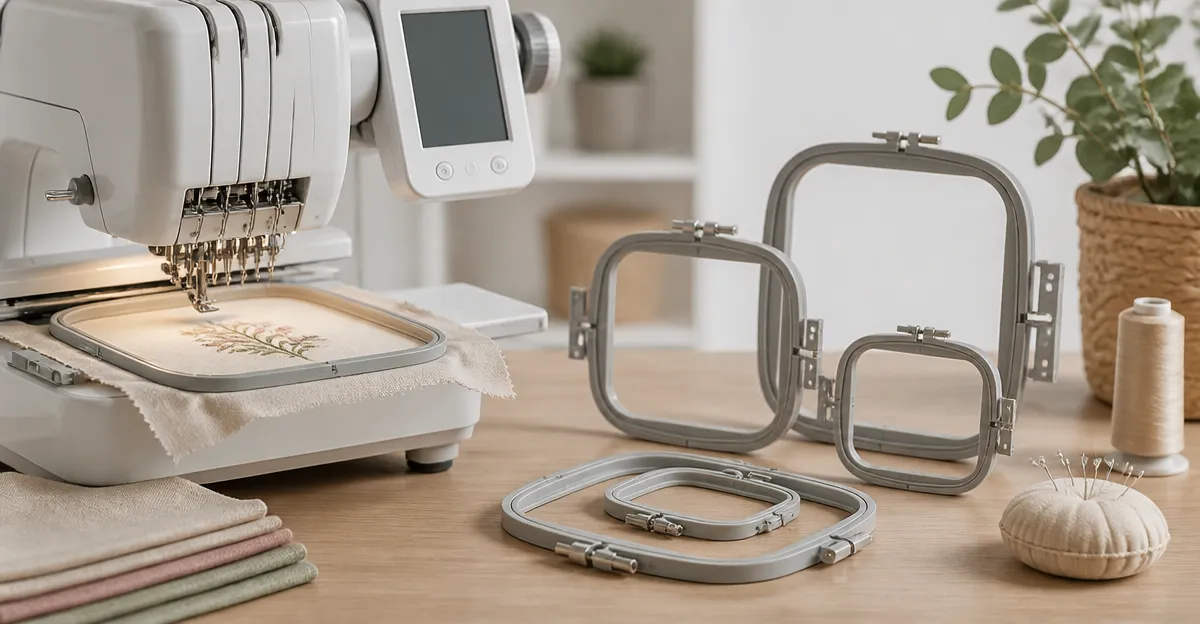
How to Choose the Right Hoop Size for Small Embroidery Machines: The Ultimate Step‑by‑Step Guide
Introduction
Choosing the correct hoop size is a foundational skill for anyone who works with a small embroidery machine. The right hoop ensures that the fabric remains taut, that stitches are even, and that the design fits within the machine's stitching area. This guide will teach readers how to assess their machine’s capabilities, measure designs accurately, match those measurements to appropriate hoops, and install the hoop for optimal performance. By following the steps, one can avoid common problems such as fabric slipping, distorted designs, and wasted thread.
While the guide can be followed with any hoop, specific products are highlighted because they address frequent challenges faced by hobbyists and small‑business owners. The recommendations are based on real customer feedback, price, and feature sets, allowing readers to make informed purchasing decisions when needed.
What You’ll Need
- Small embroidery machine (e.g., Brother PE‑800, Baby Lock Bloom)
- Fabric and stabilizer appropriate for the project
- Measuring ruler or tape (centimeters preferred)
- Embroidery hoop(s) – see product recommendations below
- Needles and thread of choice
Step 1: Understand Your Machine’s Hoop Capacity
Every small embroidery machine specifies a maximum hoop diameter, often ranging from 4 to 6 inches. Consult the user manual or the manufacturer’s website to locate this specification. Knowing the limit prevents the temptation to force a larger hoop, which can damage the machine’s moving parts.
If the manual is unavailable, a quick online search for the model name followed by “maximum hoop size” usually yields the information. For example, the Brother PE‑800 supports hoops up to 6 inches, while the Baby Lock Bloom can accommodate up to 8 inches.
Understanding this ceiling will guide the selection of a hoop set that offers multiple sizes within the machine’s limits, allowing flexibility for various projects.
Step 2: Measure Your Design Area
Before selecting a hoop, measure the dimensions of the embroidery design. Most design software displays width and height in millimeters; convert these values to inches (1 inch = 25.4 mm) for easier comparison with hoop sizes.
When measuring, add a small margin of 0.2–0.3 inches on each side. This margin ensures that the design does not sit too close to the hoop edge, which could cause stitching errors or fabric distortion.
Record the final dimensions in a notebook; this reference will be used in the next step to match the design to a hoop.
Step 3: Match Design Size to Hoop Diameter
With the design dimensions in hand, choose a hoop whose inner diameter is slightly larger than the design’s longest side. For a design measuring 4.5 × 3.5 inches, a 5‑inch hoop provides a comfortable fit, while a 6‑inch hoop would be excessive and waste valuable fabric.
For users who need several sizes, the Caydo 6‑inch Embroidery Hoops Set offers twelve 6‑inch hoops at a price of $18.99, with a rating of 4.7/5 from 6,949 reviews. These hoops are made from sanded wood, providing a smooth surface that is gentle on delicate fabrics. The brass adjustment screw ensures a drum‑tight grip, which is essential for maintaining tension during high‑speed stitching.
When a broader range of diameters is required, the Caydo Embroidery Hoop Set with Needles includes hoops from 3.6 inches to 10.7 inches, along with sixteen needles. Priced at $6.39 and rated 4.6/5 by 1,110 reviewers, this set is cost‑effective for beginners who wish to experiment with both small and medium designs. The adjustable screws feature an anti‑slip embossing texture, which helps keep the fabric firmly in place regardless of hoop size.
Both sets provide the flexibility to select the exact hoop needed for each design, reducing fabric waste and minimizing the need for re‑hooping mid‑project.
Step 4: Select the Appropriate Material
Hoop material influences weight, durability, and the tactile experience. Wooden hoops, such as those in the Caydo 6‑inch set, are sturdy and provide a classic feel. However, for users who prefer a lightweight and eco‑friendly option, bamboo hoops are an excellent alternative.
The Caydo Bamboo Embroidery Hoops Set contains seven sizes ranging from 4 inches to 12 inches, priced at $9.99 with a 4.6/5 rating from 1,451 reviews. The bamboo construction offers natural texture and a smooth surface, reducing hand fatigue during prolonged stitching sessions. Stainless‑steel screws with fine anti‑skid embossing ensure a secure grip without damaging delicate fabrics.
For those who need a slightly smaller collection, the Caydo Bamboo Embroidery Hoop Set (6‑piece) provides hoops from 4 inches to 10 inches for $8.29, also rated 4.6/5 by 8,069 reviewers. The natural appearance of bamboo adds aesthetic value to a craft studio and makes the hoops suitable as decorative items when not in use.
Choosing bamboo over plastic or metal can also reduce static buildup, which is beneficial when working with synthetic fabrics that tend to cling to metal hoops.
Step 5: Install and Tighten the Hoop Correctly
Proper installation begins by placing the fabric and stabilizer inside the inner ring, ensuring the design area is centered. Align the outer ring over the inner ring and press the two together.
Turn the adjustment screw clockwise until the fabric is taut but not stretched to the point of distortion. The brass screw on the Caydo 6‑inch hoops offers precise control, while the anti‑skid texture on the Caydo set with needles provides additional friction.
For machine‑specific hoops, the Sew Tech Brother Embroidery Hoop Set is engineered to fit a wide range of Brother and Baby Lock models. Priced at $29.39 and boasting a 4.8/5 rating from 3,584 reviews, this metal hoop set includes clear grid markings for accurate alignment and a robust metal screw that clamps fabric securely. The set is ideal for users who need a reliable replacement for factory‑installed hoops or who wish to keep multiple hoops on hand for rapid project changes.
After tightening, gently pull the fabric outward; it should resist movement but not tear. A correctly tightened hoop prevents the common problem of fabric shifting during stitching, which can cause misaligned designs.
Step 6: Test Stitching and Adjust
Before commencing the full design, run a short test stitch near the edge of the hoop. Observe the tension, stitch length, and any fabric puckering.
If the test reveals loose fabric, loosen the screw slightly and retighten. Conversely, if the fabric appears stretched, release a fraction of the tension. This iterative adjustment ensures that the final design will stitch cleanly across the entire area.
When using a hoop set with multiple sizes, repeat the test for each hoop that will be used in a project. Consistency across hoops guarantees uniform stitch quality, especially when stitching a series of related designs.
Tips & Pro Tips
- Always keep a spare set of screws; over‑tightening can strip the screw head.
- For very delicate fabrics, place a thin piece of muslin between the fabric and hoop to distribute pressure evenly.
- Rotate the hoop occasionally during long runs to prevent uneven wear on the fabric.
- Label each hoop size with a small piece of masking tape for quick identification in a busy studio.
- When using bamboo hoops, store them in a dry environment to avoid warping.
Troubleshooting
| Problem | Possible Cause | Solution |
|---|---|---|
| Fabric slipping during stitching | Insufficient tension or smooth screw surface | Increase tension using the adjustment screw; consider a hoop with a brass or stainless‑steel screw for better grip. |
| Design exceeds hoop area | Incorrect hoop size selected | Choose a larger hoop from the Caydo set with needles or reduce the design size in software. |
| Stitches appear uneven | Fabric is stretched too tightly | Loosen the screw slightly and retest; ensure stabilizer is properly placed. |
Conclusion
Selecting the right hoop size for a small embroidery machine involves understanding the machine’s limits, accurately measuring the design, matching those dimensions to an appropriate hoop, and installing the hoop with proper tension. By following the six steps outlined above, one can achieve professional‑grade stitching, reduce fabric waste, and enjoy a smoother creative workflow. The recommended products—Caydo 6‑inch Hoops, Caydo Hoops with Needles, Caydo Bamboo Sets, and the Sew Tech Brother Hoop Set—provide reliable tools that complement each step of the process, though the guide remains valuable even without purchasing them.
Apply the tips, perform a quick test stitch, and embark on your next embroidery project with confidence.
Products Mentioned in This Guide
Frequently Asked Questions
How do I determine the correct hoop size for my small embroidery machine?
Measure the machine’s maximum stitching area, then choose a hoop whose inner diameter is equal to or slightly larger than that measurement.
What are the signs that my hoop size is too small or too large for a design?
A too‑small hoop causes the design to be cut off, while a too‑large hoop lets the fabric sag, resulting in uneven stitches.
Can I use multiple hoop sizes with the same machine, and how do I switch them?
Yes; simply release the tension knob, remove the current hoop, place the new hoop, re‑tighten the knob, and re‑hoop the fabric.
How does fabric type affect the choice of hoop size?
Heavy or stretchy fabrics benefit from a slightly larger hoop to maintain tension, whereas delicate fabrics work best in a snug‑fitting, smaller hoop.
What hoop sizes are recommended for popular small machines like the Brother PE‑800 or Baby Lock Bloom?
A 4‑inch hoop works well for the Brother PE‑800, while a 5‑inch hoop is commonly used with the Baby Lock Bloom for most projects.