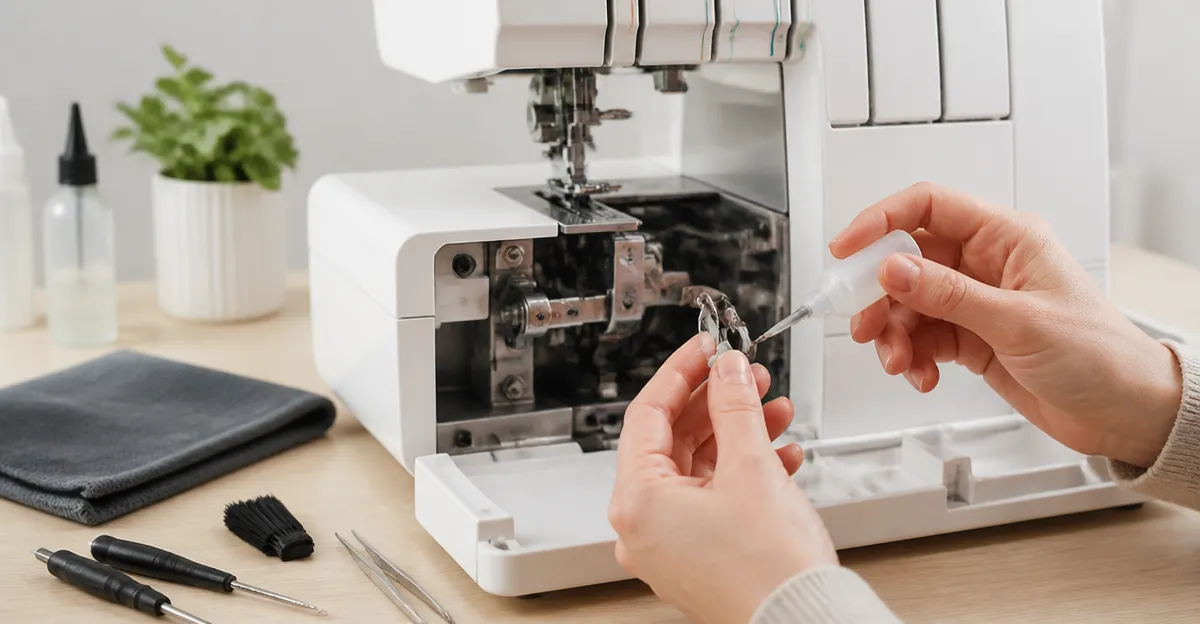
How to Clean and Oil Serger Loopers at Home: A Step‑by‑Step DIY Guide to Smooth Stitches and Longer Machine Life
Maintaining the loopers of a serger is essential for achieving consistent stitch quality and preventing premature wear. This guide teaches the reader how to safely remove lint, apply the correct lubricant, and reassemble the machine so that it operates quietly and efficiently. By following the procedures, one can extend the lifespan of a serger, reduce costly repairs, and enjoy smoother fabric handling.
What You’ll Need
- Sewable Sewing Machine Oil – 4 oz, flexible telescoping spout, 4.9/5 rating.
- Singer Sewing Machine Oil – 3.38 oz, 4.8/5 rating, affordable.
- Liberty Sewing Machine Oil – 4 oz, clear non‑staining oil, 4.8/5 rating.
- Sewing Machine Oil Kit – 1 oz bottle, needle‑tip applicator and cleaning brush, 4.8/5 rating.
- Savina Lint Brush – wooden handle, high‑density nylon bristles, 4.7/5 rating.
- Soft lint‑free cloths, a small Phillips screwdriver, and a container for collected debris.
Step 1: Prepare Your Workspace and Gather Tools
Begin by clearing a well‑lit table and laying a clean, static‑free cloth. Unplug the serger to eliminate any electrical hazard. Place the Savina Lint Brush nearby; its wooden handle provides a comfortable grip while the nylon bristles reach into tight corners without scratching metal surfaces. Having a soft cloth ready will allow you to wipe away excess oil later, preserving fabric integrity.
The Sewing Machine Oil Kit is also useful at this stage because its included brush can dislodge stubborn lint before lubrication. The kit’s triple‑seal bottle ensures no accidental spills while you work.
Step 2: Access the Loopers
Consult the serger’s manual to locate the looper housing screws. Using a small Phillips screwdriver, remove the screws and gently lift the looper cover. Most modern sergers expose two loopers – the upper and lower – each containing a small set of gears and a needle‑like tip that forms the stitch loop.
Take note of the orientation of each looper; a quick photograph can prevent reassembly errors. The exposed area will likely contain lint, thread fragments, and fine dust that impede smooth motion.
Step 3: Remove Lint and Debris
With the loopers exposed, employ the Savina Lint Brush to sweep away loose fibers. Its high‑density nylon bristles flex enough to reach the narrow feed dog channels while remaining firm enough to dislodge compacted lint.
For stubborn particles, the cleaning brush from the Sewing Machine Oil Kit provides a finer tip. Gently brush the gear teeth and the looper’s inner surfaces. Avoid using compressed air, as it can force debris deeper into the mechanism.
After brushing, wipe the area with a lint‑free cloth to capture any remaining dust. A clean surface ensures that the oil will coat metal uniformly rather than mixing with contaminants.
Step 4: Apply the Appropriate Oil
Choosing the right lubricant depends on personal preference and the machine’s usage frequency. For most home users, a light, non‑staining oil works best because it reduces friction without attracting additional lint.
- Sewable Sewing Machine Oil – Its flexible telescoping zoom spout reaches deep into the looper’s hard‑to‑access points, delivering precise drops. The 4 oz bottle (price $9.95, rating 4.9/5) lasts for many applications, making it cost‑effective for regular maintenance.
- Singer Sewing Machine Oil – This 3.38 oz bottle (price $5.50, rating 4.8/5) is praised for its clean, pure texture. It is an excellent choice for occasional oiling or for users who prefer a smaller quantity.
- Liberty Sewing Machine Oil – Featuring a stainless‑steel needle tip, this 4 oz clear oil (price $9.95, rating 4.8/5) excels in precision tasks such as oiling the tiny looper tip. Its high‑viscosity index ensures a thin film that does not gum up over time.
Begin by placing a few drops of the chosen oil onto the needle‑tip applicator. If using the Sewable Sewing Machine Oil, extend the zoom spout to the interior of the looper and dispense one to two drops directly onto the moving parts. The oil should seep into gear teeth and the looper’s pivot points.
When using the Sewing Machine Oil Kit, the 1 oz bottle’s precision needle‑tip allows you to control the amount, preventing over‑oiling, which can attract lint. After applying oil, rotate the looper manually (if possible) to spread the lubricant evenly.
Regardless of the brand, the rule of thumb is to use the minimum amount required for a thin, glossy coating. Excess oil can create a sticky residue that draws dust, defeating the cleaning effort.
Step 5: Reassemble and Test the Serger
Once the oil has been evenly distributed, replace the looper cover and secure the screws. Re‑connect the power cord and turn the serger on. Run a short test seam on scrap fabric, observing the stitch formation and listening for any unusual noises.
If the loopers move smoothly and the stitch quality is consistent, the maintenance was successful. If you notice grinding or uneven loops, repeat the cleaning process, ensuring that all lint has been removed before re‑applying oil.
Tips & Pro Tips
- Perform this cleaning routine every 8–10 hours of sewing to prevent buildup.
- Store lubricants in a cool, dark place; heat can degrade oil quality.
- When oiling, work in a well‑ventilated area to avoid inhaling fumes, even though the oils are low‑odor.
- For machines used in dusty environments, add a second light oiling after each major project.
- Use the Sewing Machine Oil Kit brush to clean the bobbin case before oiling; this prevents residual lint from re‑entering the loopers.
Troubleshooting
| Problem | Possible Cause | Solution |
|---|---|---|
| Loopers make a grinding noise | Residual lint or insufficient lubrication | Remove the looper cover, clean with the Savina Lint Brush, re‑apply a thin layer of oil using the Sewable or Liberty oil. |
| Stitch loops are uneven | Oil applied to the wrong area or over‑oiling | Wipe excess oil with a lint‑free cloth, re‑oil precisely using the Sewing Machine Oil Kit’s needle tip. |
| Oil residue on fabric | Using an oil with high viscosity or spilling | Switch to a lighter oil such as Singer Sewing Machine Oil and ensure the applicator tip does not touch the fabric. |
Conclusion
By following the outlined steps—preparing the workspace, accessing the loopers, removing lint, applying a suitable oil, and testing the machine—one can maintain serger loopers effectively. Regular maintenance not only yields smoother stitches but also prolongs the machine’s operational life, saving time and money. The recommended tools, including the Sewable Sewing Machine Oil, Sewing Machine Oil Kit, and Savina Lint Brush provide precision, safety, and convenience for both novice and experienced sewers.
Products Mentioned in This Guide
Frequently Asked Questions
How often should I clean and oil the loopers on my serger?
Clean and oil the loopers after every 8–10 hours of sewing or whenever you notice lint buildup or reduced stitch quality.
What type of oil is safe for serger loopers?
Use a light, non‑staining sewing machine oil such as sewable, Singer, or Liberty machine oil; avoid heavy or petroleum‑based lubricants.
Can I clean serger loopers without disassembling the machine?
A quick surface clean with a soft brush can remove surface lint, but thorough cleaning requires removing the looper housing to access internal parts.
What tools do I need to remove lint from the loopers?
A small brush, a lint‑removal pick or compressed air, and a soft cloth are sufficient for most looper cleaning tasks.
Will oiling the loopers extend the life of my serger?
Yes, proper lubrication reduces friction, prevents wear, and helps maintain smooth stitch formation, prolonging the machine’s lifespan.